


It's OK to be Ugly!
Yes, seriously. I actually havent been using my concealer sinces ages because I've got photoshop! Hahaha. And when concealer plus flash, the picture you take will suck. Okay, that's not the point but this post is actually a post to teach you how to fix your pictures in Adobe Photoshop, in basic steps. And this is also usually how I fix my pictures before posting :) Of course, firstly you have to launh your programme. Then, open the picture or pictures that you want to fix. One rule that I always insist in photoshop is DUPLICATE your picture before you edit it. Things will go wrong okay. Nobody is perfect and bumi mana yang tidak ditimpa hujan. Haha. You can always undo your wrongs but there is only limited times you can undo it. And therefore by duplicating the layers before editing them actually helps you when you cant undo your wrongs anymore. You can actually erase the partial of the duplicated layer later. 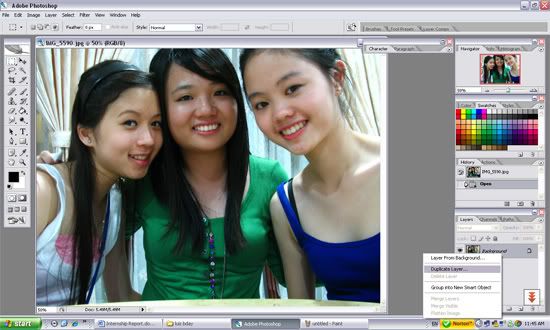 How to duplicate layers in Adobe Photoshop? Easy! Like shown in the image above, right click on the bar at the bottom right of your screen that says, "Background" then click on "Duplicate Layer". Click on "OK" layer. Then, you'll see another layer pop up above the "Background" layer. What's next? The next step is changing the levels in photoshop automatically. Why? It actually helps you to re-adjust the levels, or to say, the colour of your picture. Like, if there's a blue tinted layer on your picture because you took the picture in early morning, "Auto Levels" will help you re-adjust it to the original colour it supposed to be. There is another function, "Levels" but its very mafan because you cannot adjust it automatically.  How to make auto levels? Well, go to "Image" at the bar on top, "Adjustment" then, hit on the "Auto Level" button. That's even easier right? Hehe. After Auto-ing your levels, you'll see the difference of your original picture's colour and also after that. You can see the difference easily by clicking on the "Visible/Invisible" icon which looks like an eye. Okay okay, after that, one of the most important step; removing pimples!! Pimples are sick and I have plenty of them that lasted from internship. Besides pimples, what also can remove. Wrinkles lar, mole lar, scar lar, anything lar.  How to remove my pimples? Just by a few clicks away! Click on the icon that has a plaster on it. It is the "Spot Healing Brush" that will help you making yourself pretty :) In my advice, you should enlarge your picture so that you can erase them cleanly and precisely. Make sure your brush size is same as your pimple or not you might ruin your skin. 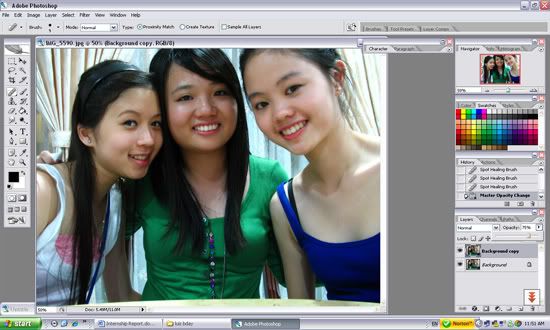 Like me, I also remove my neck's wrinkles or whaever you call it. But if you remove it completely, it might look very fake, and this is what you can do. Adjust he opacity level! How ah? How to adjust the opacity level ah? Okay, move to the box which I cant remember the name, on the bottom righ tof the screen again like shown in above, just kindly adjust the percentage of it. It works like adjusting the transparency of the layer. You can adjust it to any percentage suiting to yourselves. And that is all. This is what i usually do to my pictures. Secret revealed! And now, I am solving a question people usually ask me. Why are your pictures so sharp? Whay are the colours so nice? Well, actually ah, its because of the camera. Canon can produce very sharp coloured pictures one lor, especially under the sunlight. I dont need to photoshop it one. But if you want to know how I'll show you how :) 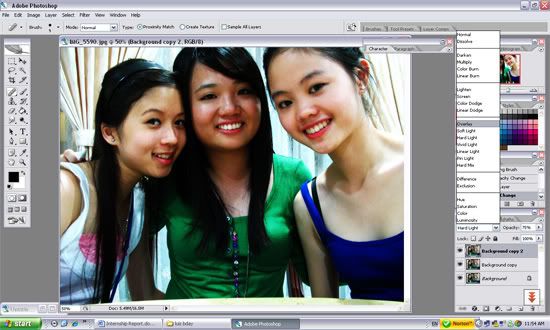 Go back to the righ bottom box where you see "Normal" with an arrow beside. Change it to "Overlay". And you'll see the difference. Haha. You can actually play with the options and you'll get different fun effects. As you can see after choosing the "Overlay" option, the colour turns very very fake. So as usual, adjust the opacity until it suits you :) And that's all!  Ooh! And did you forget to duplicate that layer before adjusting the colour? ;p 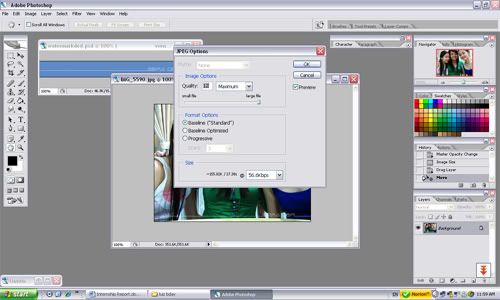 And finally, you can save up your work after adjusting to the size you want it to be. And remember to adjust your image to the maximun quality to have good pictures. If you save it under 10, your pictures will come out looking pixelated. Ew. AND THAT'S ABOUT IT! THIS IS HOW I USUALLY EDIT MY PICTURES :) 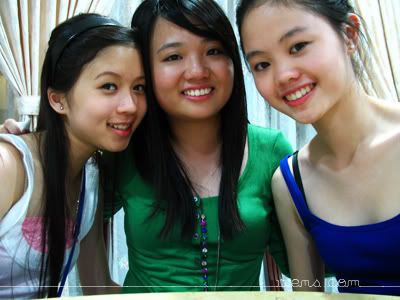 The final product after adding the watermark :D So how, did you learn anything you dint know? I hope you did! Enjoy playing with Adobe Photoshop. Note: This might not be the most accurate way, or the right way, or the simplest way but it is how I make things work :) Labels: Guide |
 Blogged at 6:33 PM
Comments on "It's OK to be Ugly!"
-
 MSsaid... (January 26, 2008 7:20 PM) :
-
 Anonymoussaid... (January 27, 2008 6:44 PM) :
-
 alea aminsaid... (January 28, 2008 12:10 AM) :
-
 ms.bulatsaid... (January 28, 2008 12:10 PM) :
-
 Anonymoussaid... (January 28, 2008 11:11 PM) :
-
 pinkpausaid... (January 29, 2008 3:26 AM) :
-
 Anonymoussaid... (January 29, 2008 4:15 PM) :
-
 Phooiszesaid... (January 30, 2008 9:37 PM) :
-
 Anonymoussaid... (February 06, 2008 5:34 PM) :
-
 Anonymoussaid... (February 06, 2008 5:36 PM) :
post a commentthats why most of the people cant recognize their favourite blogger on the streets =.=
now i know how u make ur pictures but you dont look ugly in pimples also.
Ahh, The wonders of photoshop. But at least you dont look any different but just pimple-less thats all compared to other bloggers that photoshoped their face kao2 when see in real life..... pecah cermin. T-T
aper ni...maciam no difference la that satu biji pimpleeeee: P photoshop what. still pretty
hi, how do u make a watermark? using brushes? i tried to make one but it looks ugly. =( do u save your watermark as a brush so that you don't have to draw it again everytime?
"Nobody is perfect and bumi mana yang tidak ditimpa hujan. Haha."
hahahahahaa vivien sam why are you so funny!
ms : i guess i'm okay. hahahaha.
she : just for examples :)
alea : hahaha i just want to remove things that do not belong to my face and wont add anything extra ;p
ms. bulat : hahaha no lar, just teaching. hehehe.
miss cc : mine is a font type. and ah, yes i saived it as a PSD file so that i can add them easily another time..
pinkpau : er.. did i say anything wrong? i thought it was lame though. hahaha.
ahhaha i use brush to correct pimples wan wor. o.o did i do it wrongly?! xD
ooh la la! thanks for that one. now i know how to remove the eeky wrinkles without making them look too fake =p
p.s. actually, you don't look too different with or without the pimples